Welcome to the second part of our ALM series 🚀 In the first part we discussed the idea behind it and made a rough sketch of how one can implement a Power Platform specific ALM process. In this part, we are looking at the Source Control step of it.
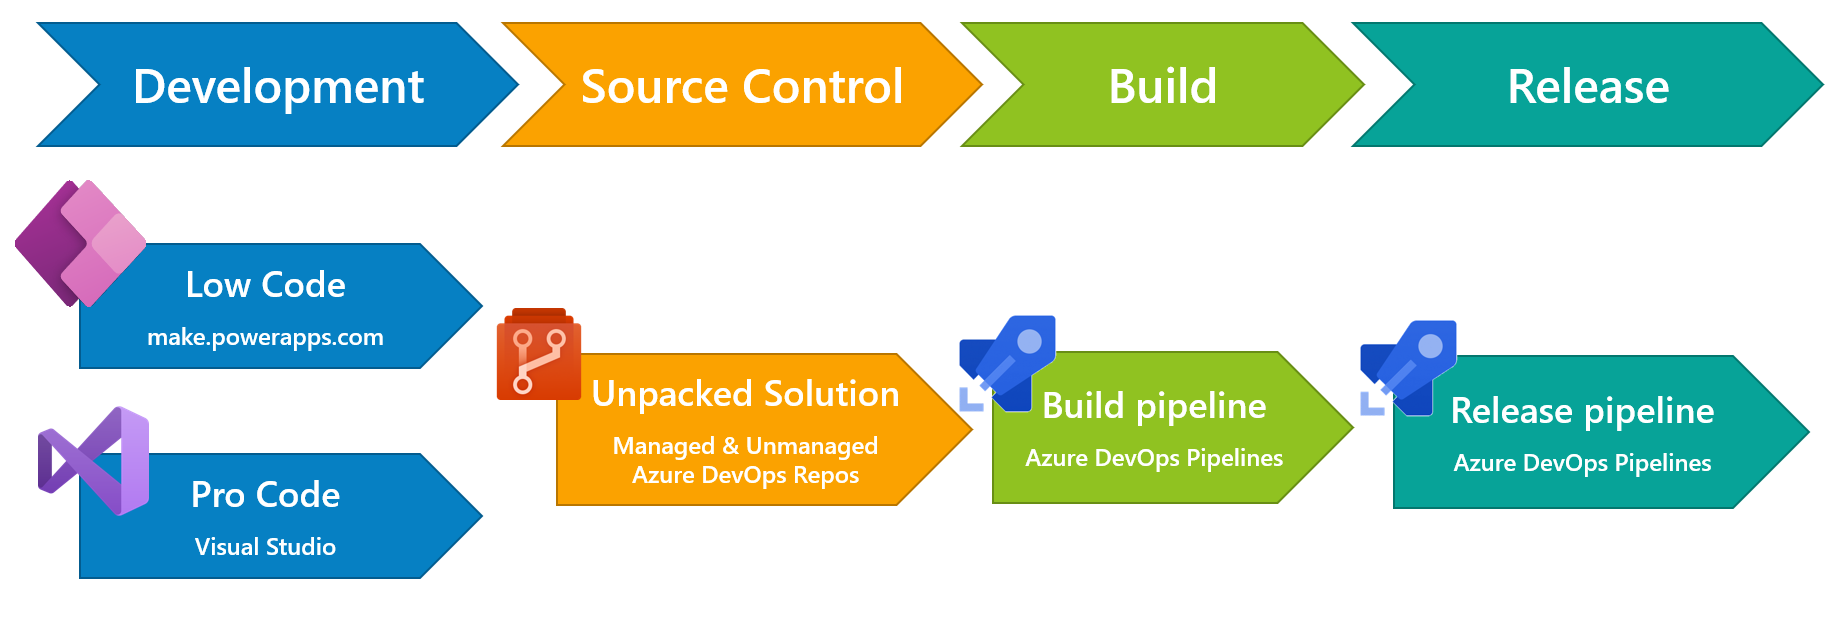
Source control is our storage of every version and change we are making to our solution. This is incredibly helpful for documentation purposes but you can also easily roll back to the previous version. For example, if you deleted something by accident, using Source control basically gives you an undo functionality 🤯 While the storage of changes is its main purpose there are other advantages as well which will improve your overall solution quality.
We will use the spkl Task Runner from Scott Durow a lot in the coming parts because it makes the whole process A LOT more fun. Thanks a lot for creating such an awesome tool Scott! ❤
💪 Let’s start - Requirements
There are multiple tools you can use to achieve this, I will use Visual Studio for it in this blog post simply because I’m familiar with it and we can use it later to do “Pro-Dev” developments as well. If you want to discover other options take a look at Michael Megels great post on how to use the Power Platform CLI and other helpers in Visual Studio Code 👉 Application Lifecycle Management for Power Apps: Tools
To follow this blog post you need a Visual Studio, I will be using Version 2019.
🤔 Setting up Visual Studio
Everything in Visual Studio is organized in projects and solutions. A solution can contain multiple projects and is basically just a folder for them. Sounds familiar to another type of “solution” we discussed in the first post? 😉 So be aware of the different meanings of “solution” between Power Platform and Visual Studio. To keep things simple and efficient later on follow this advice:
Create one Visual Studio solution for every Power Platform solution you have
Within the Visual Studio solution we will create multiple projects with the following structure:
- Solution
- Project “Solution” - will store the Power Platform solution files
- Project “Plugins” - will store Pro-Dev code for plugins
- Project “Webresources” - will store Pro-Dev code for javascript
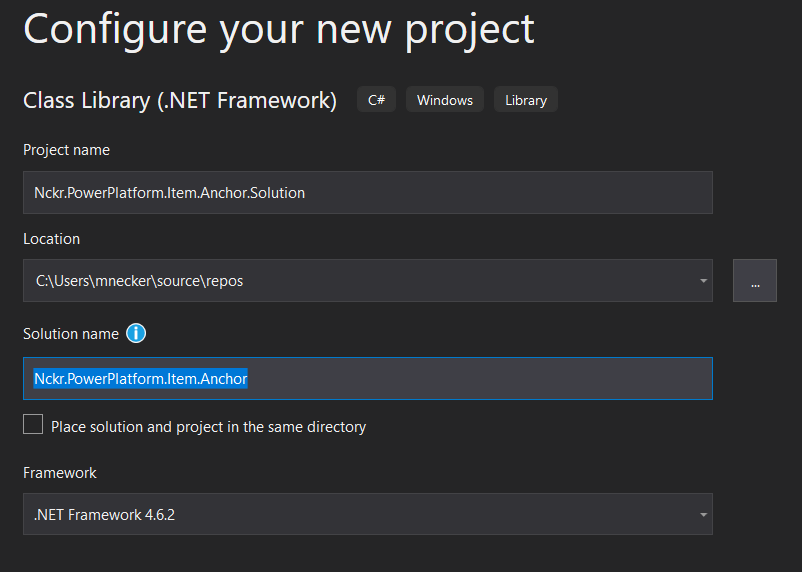
In my example I have a solution called “nckr.Item.Anchor” and I will create a solution called “nckr.PowerPlatform.Item.Anchor” with a project called “nckr.PowerPlatform.Item.Anchor.Solution”. As a project template always choose “Class Library (.NET Framework)” for your Solution project.
After creating the project you can delete the automatically created “Class1.cs” file.
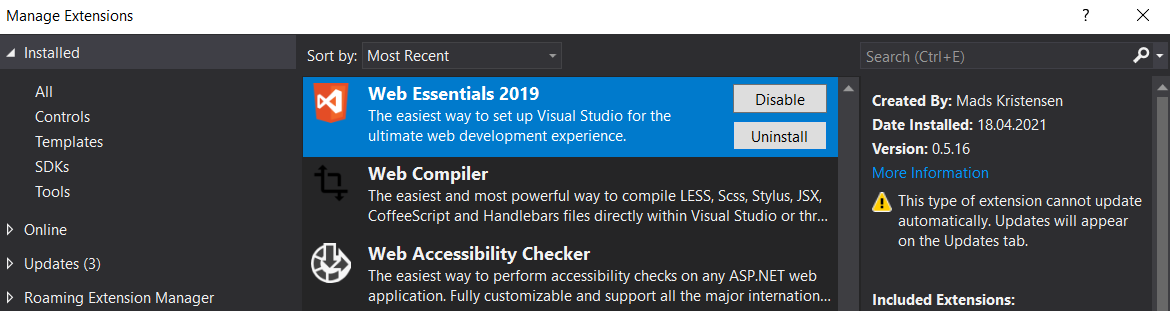
We will also install one Visual Studio extension which makes our life a lot easier in the next steps. For that click in the Visual Studio menu on “Extensions” / “Manage extensions” and install “Web Essentials 2019” (version according to your Visual Studio version). We will use it later to directly start scripts in the project.
✨ The good parts: spkl
As announced at the beginning of this post I want to introduce you to spkl from Scott Durow. He describes it like this:
Simple and Lightweight deployment task runner for Dynamics 365
But that doesn’t really do it justice. We will use spkl for a lot of tasks directly involved in the ALM Power Platform process:
- Extract solution managed & unmanaged (this post)
- Develop pro-dev components locally and deploy them easily
- Pack solutions for easy deployments between environments
And you can do all that from Visual Studio ✌ You just need to install the nuget package spkl in its latest version. You can install nuget packages by right-clicking on your Visual Studio project and selecting “Manage NuGet packages…”.

It will also install the Microsoft SDK nuget package “Microsoft.CrmSdk.CoreTools” as a dependency. As soon as you accept the license terms you will find the spkl files in your project.
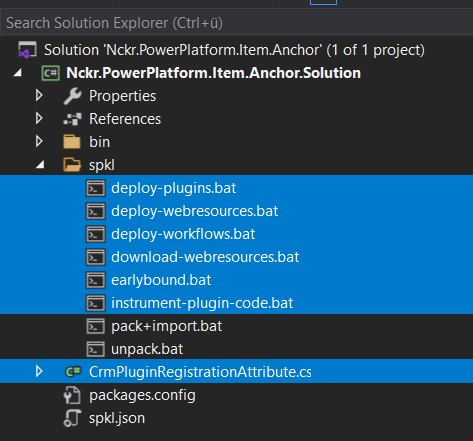
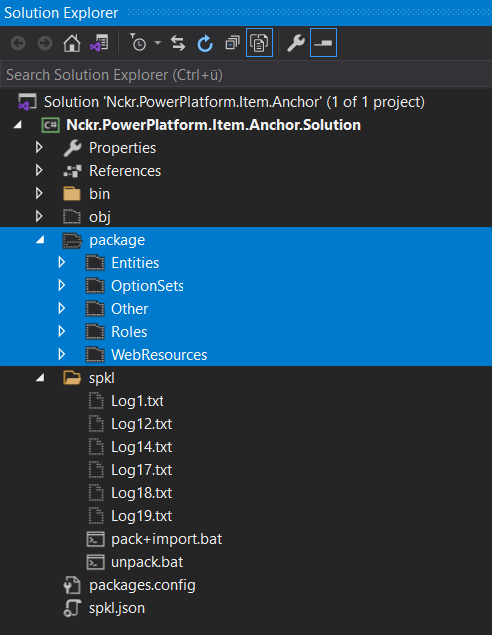
I like to keep Visual Studio projects clean and as I mentioned, spkl can do a lot, but not all of that is needed for this Solution project. You can easily delete the files marked in the screenshot above, we only gonna need “pack+import.bat”, “unpack.bat” and “spkl.json”.
The most important file is “spkl.json”. This JSON file contains all the needed configurations for spkl to run properly and connects it with the correct Power Platform solution. It contains the following main parts:
- Plugins
- Needed for plugin development (Pro-Code, later post)
- Earlybound
- Needed for plugin development (Pro-Code, later post)
- Webresources
- Needed for javascript development
- Solutions
- Everything for the unpack / pack of solutions (this post)
Again, keep only what you need, you can easily delete the “Plugins”, “Earlybound” and “Webresources” attribute from the JSON, they will not be needed in the Solution project.
You should take a look and change the following attributes:
- “solution_uniquename”
- the technical name of the solution you want to export
- “solutionpath”
- name of your packed solution, to make later deployments easier change it to a fixed value like “solutionname.zip”
- “packagetype”
- Controls whether you export your solution as managed or unmanaged or both. Should always be “both managed import” to store the unmanaged and managed version of your solution.
- You will need the managed version for deployments but always keep the unmanaged as well, it will be needed if you want to set up a new development environment.
After we did this short setup we can extract our solution components for the first time. Thanks to the installed “Web Essentials 2019” you can right-click on the “unpack.bat” file and select “Execute File” to start the spkl dialog.
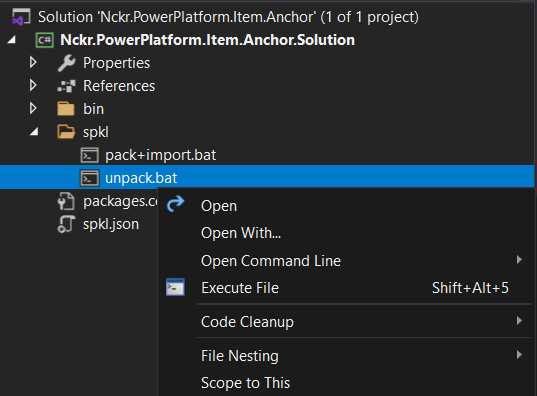
In the opened dialog you can connect to various Power Platform environments. It will store your history and credentials per environment, so you only have to log in once. Once your first start, it will be empty but you can create a new connection by pressing “0”. The dialog will ask for the URL of the environment and open the Microsoft login UI for you to log in. After a successful login, spkl will export the solution and split it into small files.
After you did this, you might not see any added files in the Solution Explorer of Visual Studio. That’s because the files are there but Visual Studio didn’t automatically add them to the project. You can view them by selecting “Show All Files” and the “package” folder will be visible.
You should not add those files to your Visual Studio project, for the next steps it’s irrelevant if they are included or not, they will be added to the source code repository either way. But sometimes including them can confuse Visual Studio and lead to Build errors.
Note that there were also a lot of “.log” files created in the “spkl” folder. Delete those since we don’t want to have them in our repository 🚮
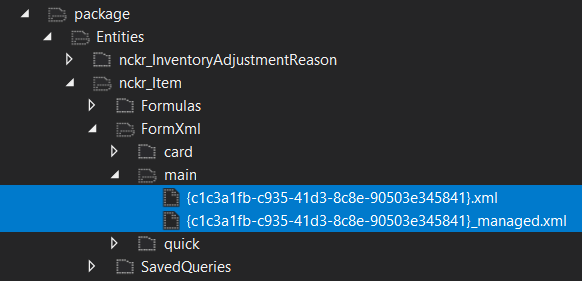
If you take a closer look into the package folder, you can see that for every component of your Power Platform solution multiple files got created, sorted into logical folders by type. The multiple files come from our setting to export “both managed unmanaged”. For example, if I look at the main form for my custom entity I can see that there are two XML files for the same GUID (aka form), one with the suffix of “_managed”. This is awesome because now you have a managed and unmanaged solution extracted!
👉 Next steps
Now we have everything prepared for our next step, checking in those files to your source control. We will use Azure DevOps and Git for that. But since this post again got longer than I thought it would I will post about this in the next part, stay tuned! 🙂